The painting was just purchased by our client at auction and we decided the best way to proceed would be to bring the paintings into the studio for a full assessment with our conservators. This would allow us to see the full extent of the prior repairs and understand the most suitable approach to successfully treating the painting for a seamless restoration.
Assessment
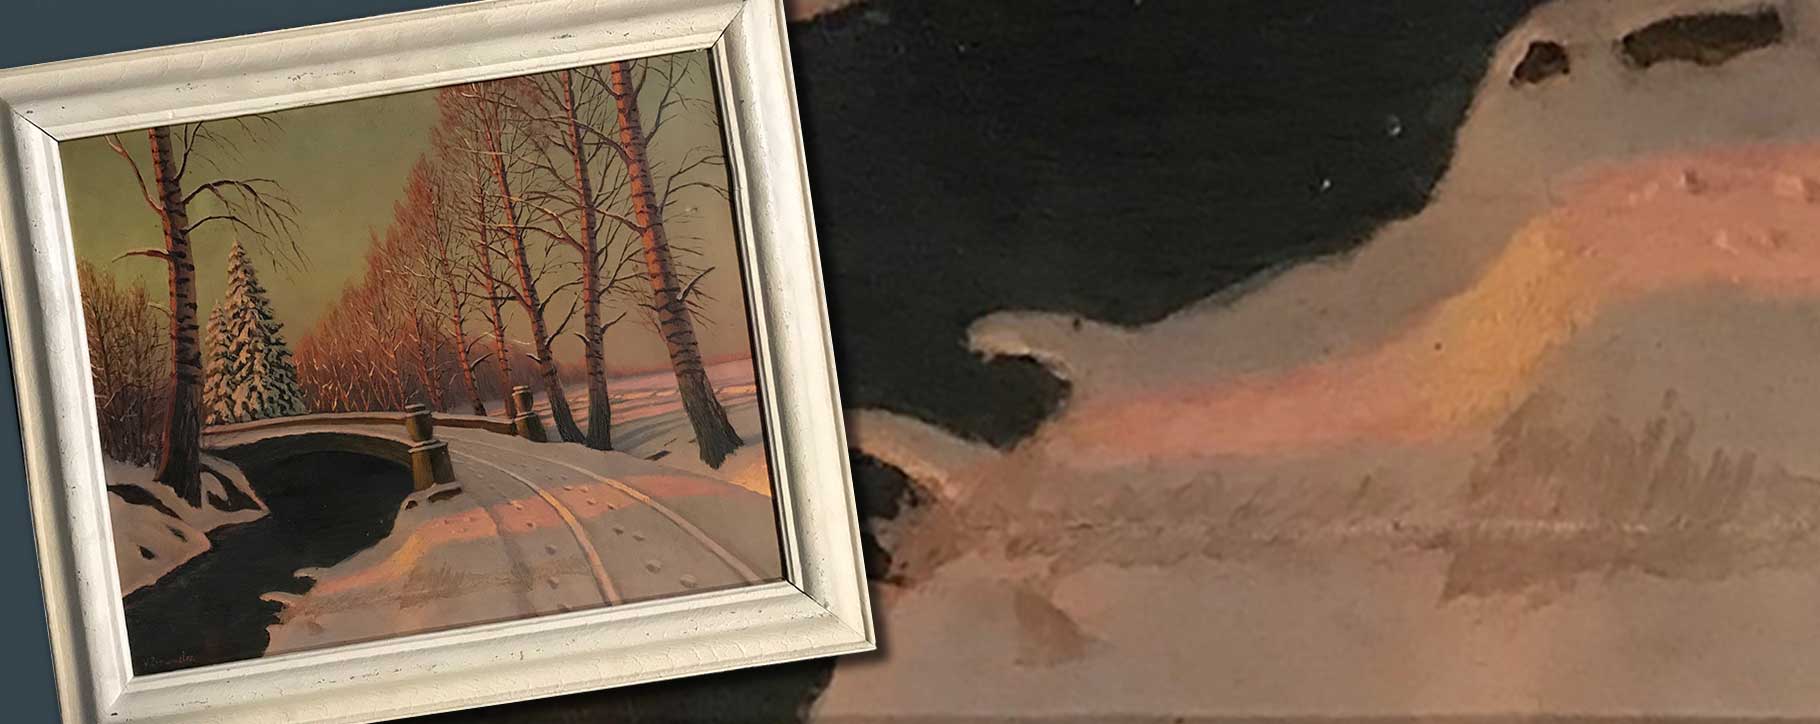
The painting is a winter landscape scene by Russian artist Victor Emanuelov, who painted predominantly in the early twentieth century.
On seeing the painting in person, we first looked at the prior tear repair in detail.
It was apparent that the tear had actually been repaired, however, the filler that was applied for retouching, and then the retouching itself, was rather clumsy.
Too much filler had been applied to the areas of lost paint and so it was very raised against the surface of the painting. When retouching we normally use a suitable retouching medium paint, but oil paint was used instead which was also very thick. Furthermore, the retouching had covered both the tear and also the undamaged painting, which included the original paint.
Aside from this, there was also a smaller tear in the tree branches that would need to be repaired, and the painting itself was quite dirty.
It was entirely possible to address all of these areas, and our client was happy for us to proceed.
The restoration
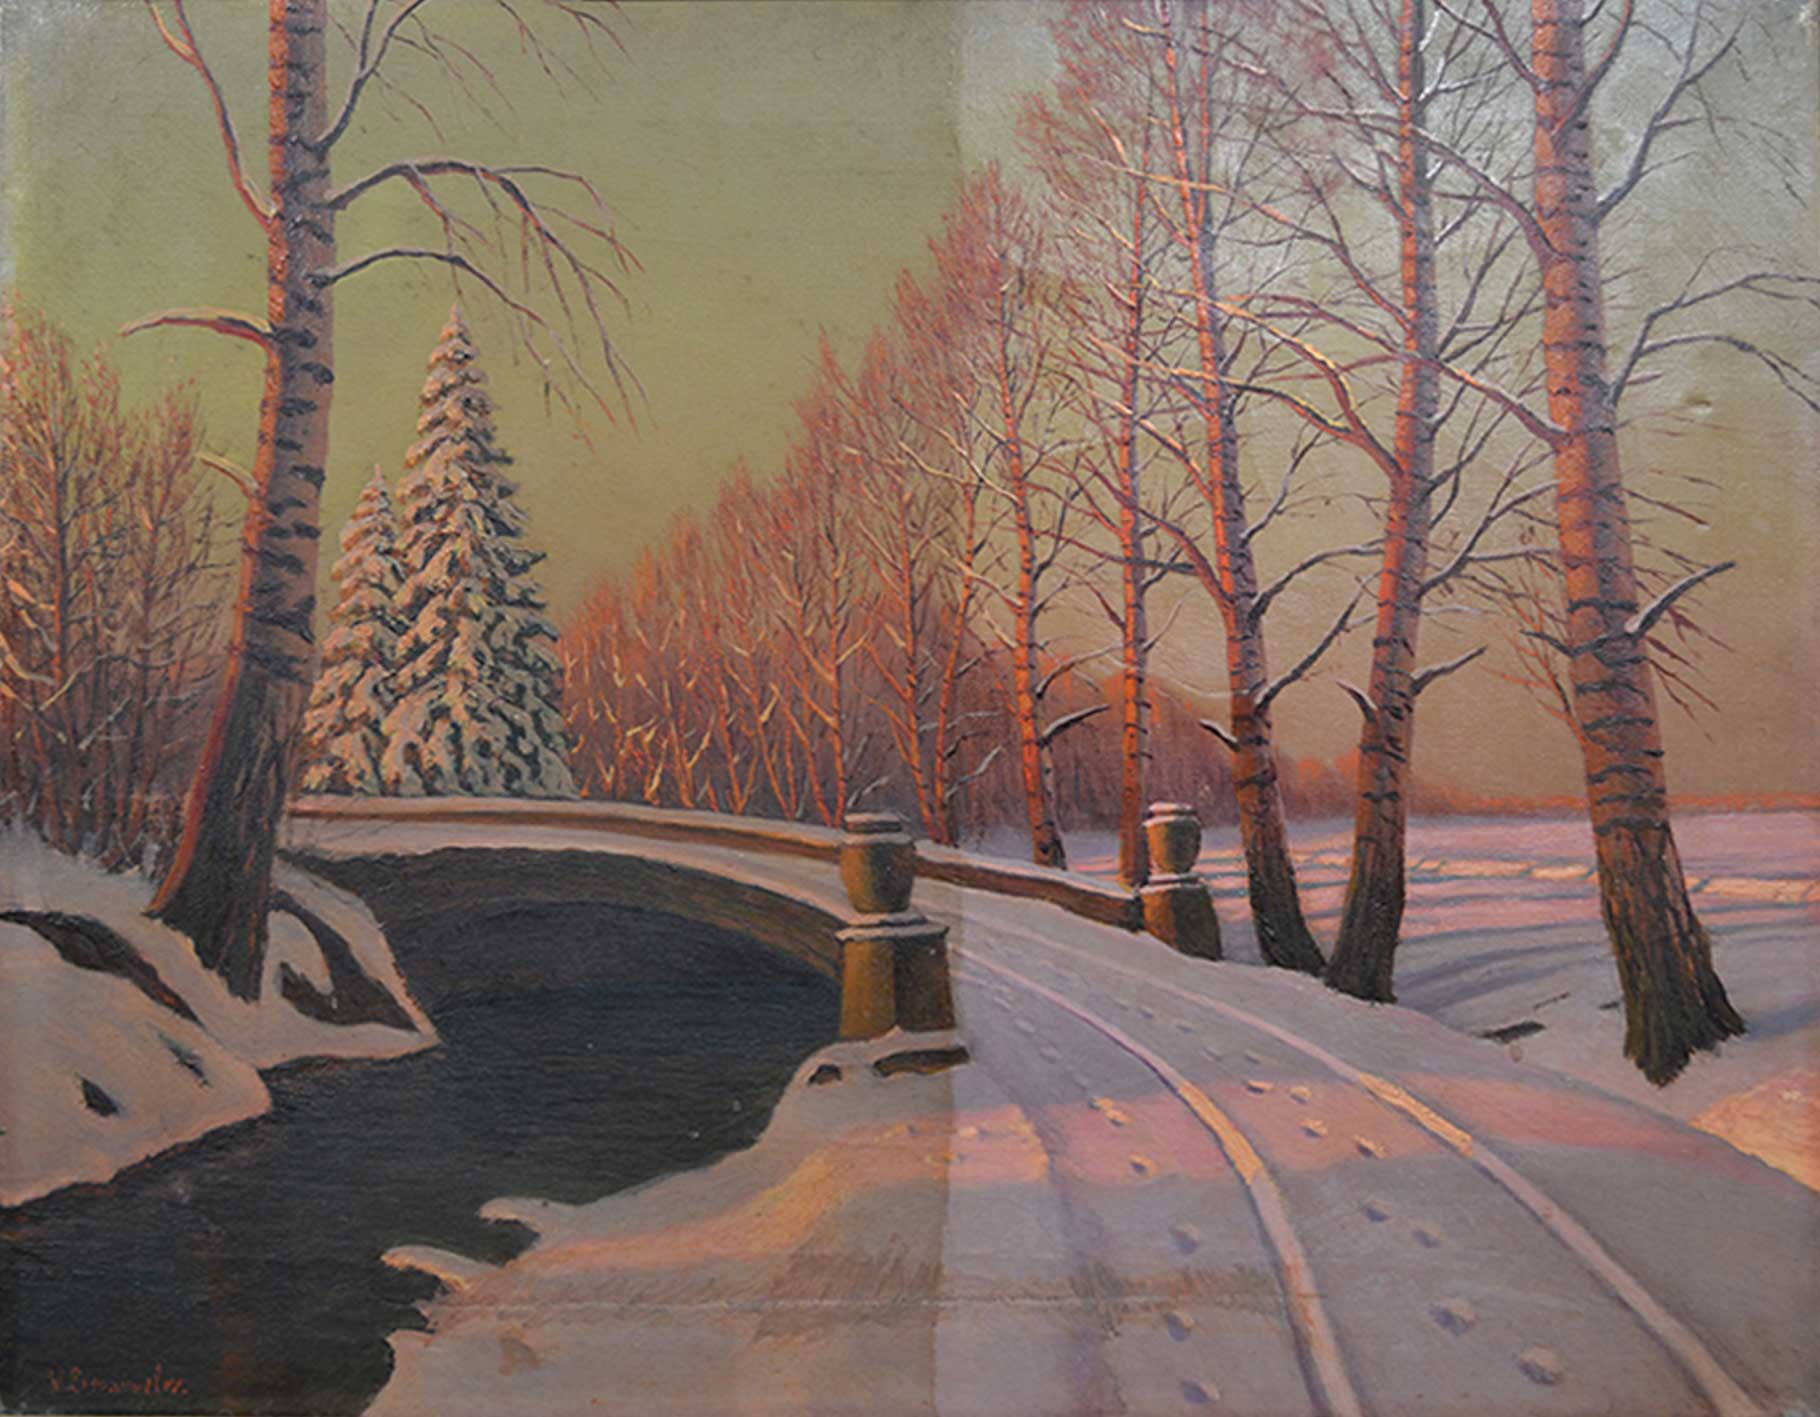
There was a substantial layer of dirt covering the painting, and so we completed the relevant tests to find the best solvent for surface cleaning, and then varnish removal.
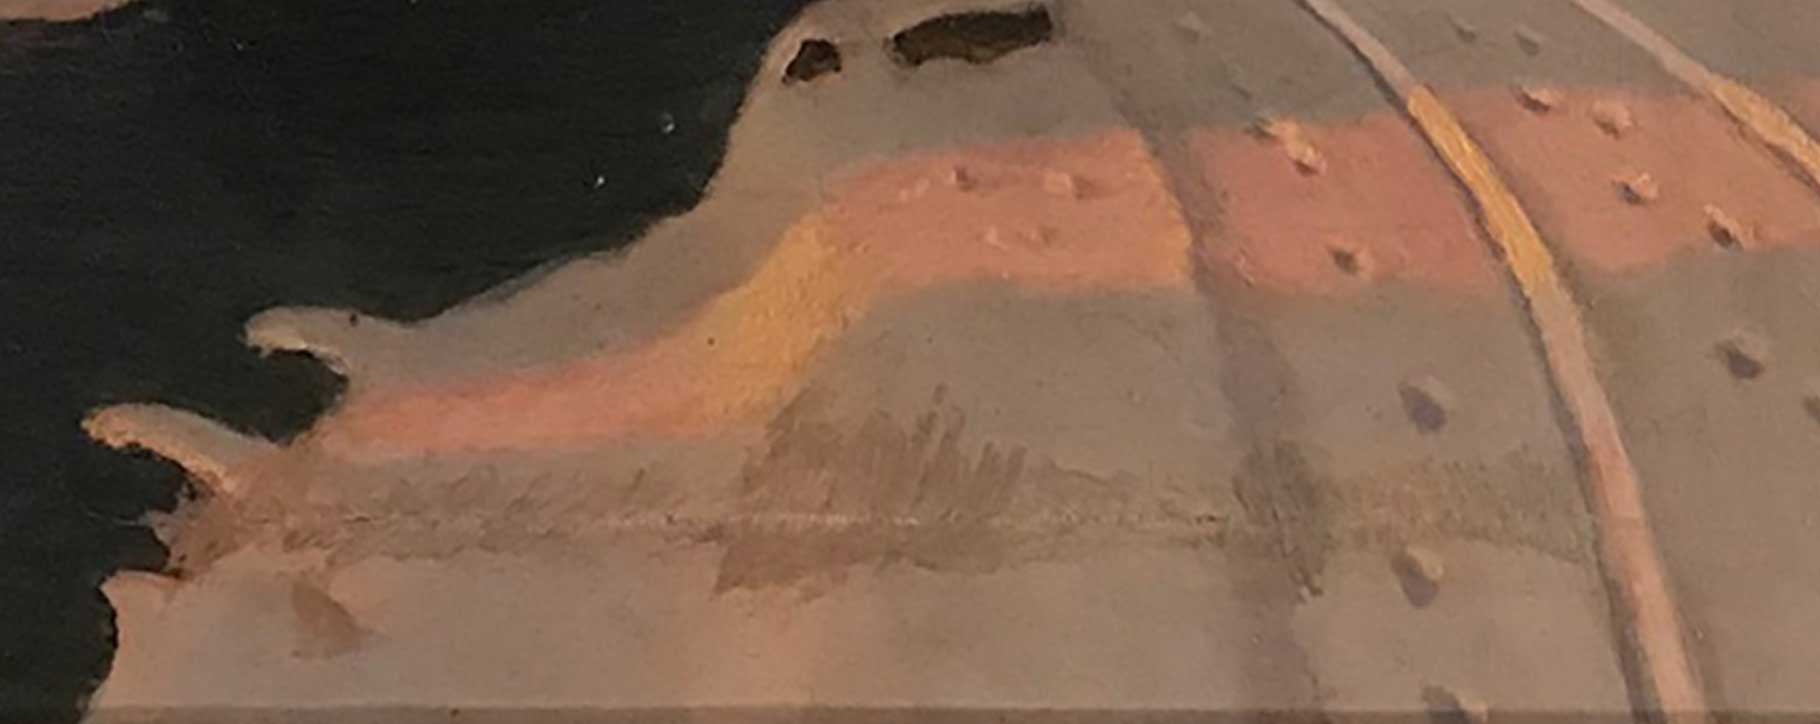
As expected, there was an excellent difference from surface cleaning and varnish removal, and it achieved a great halfway photograph. During this stage, the poor repairs were at their most obvious – especially as the retouching was a brighter peach colour against the snowy background.
The small tear visible as a white mark in the trees was also repaired using a thread-by-thread method with bonding. This was a much smaller area of damage than the large tear that had happened across the lower half. We ensured that this substantial tear was structurally stable and would not undo or cause issues going forward.
For this area of previous damage, we mechanically removed the thick paint used for retouching and then the filler underneath. This was a time-consuming process to chip away at both layers, and eventually, we removed the unnecessary additional filler. When we apply filler, it’s very important to create an even finish so that the new retouched paint will not be raised and will integrate with the rest of the painting. We levelled off the old filler and applied new where there was some paint loss.
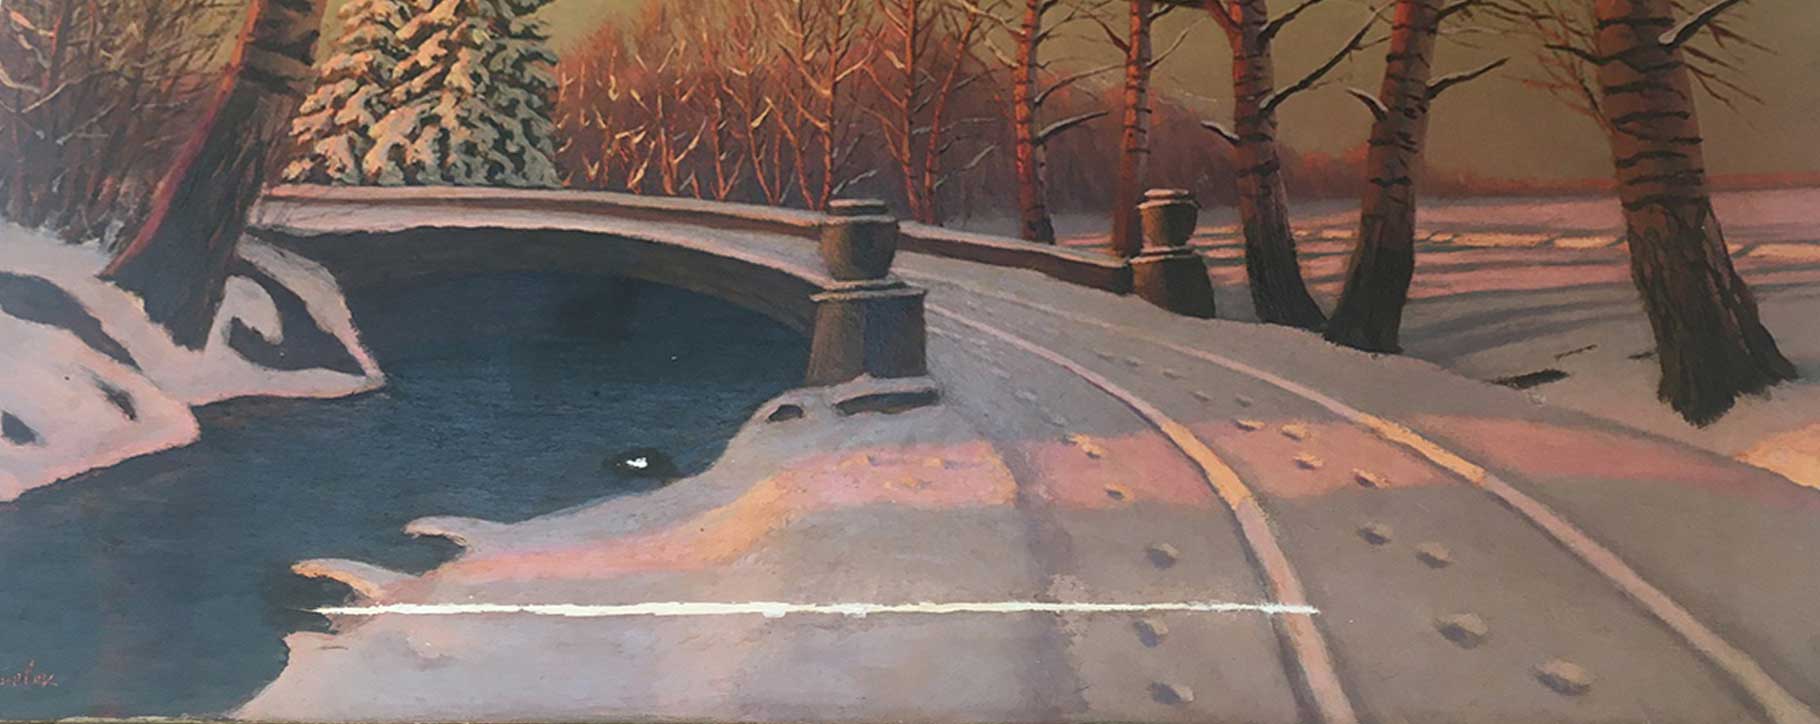
Before the filler dried, we applied an isolating layer of varnish to provide additional support to this area. Then when the varnish layer had dried, we carefully pigment matched against the existing paint layer and started retouching. This careful retouching unified that damaged area, resulting in a much more sympathetic repair. After a final coat of protective varnish, the restoration was complete.
Our client was delighted with the results. Compared to how the painting looked upon arrival, it is now not possible to see where the damage had occurred and the difference is a wonderful seamless restoration.

If you have a similar artwork and would like our advice, please contact us for our obligation-free advice and recommendations.
The post Case Study: Righting restoration wrongs – how a tear repair should actually look… appeared first on Fine Art Restoration Company.