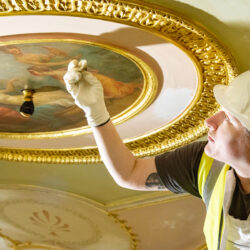
As we approach the end of the year, we’ve taken an interesting look back over the many restoration projects we have had the pleasure to complete in 2019. From tears and missing canvas to water damage and foxing, we have treated all manner of artworks, ceramics and furniture this year. Here are some highlights from recent restorations, all with wonderful results!
Take a look below and keep checking back on our website to see more fascinating projects in 2020!
The 17th Dutch oil painting with huge tears
This restoration was a unique one for a number of reasons. Not only was it a fascinating painting to work on requiring multiple treatments, but we also had the pleasure of being able to involve our clients in the restoration. Upon receiving the painting in our studio for assessment, the first thing that became apparent was how dirty the painting had become. Due to it being kept in a farmhouse, there was dirt, cobwebs and insects on the front and back of the painting.
The painting also had perished varnish which caused the discolouration to the overall appearance and signs of prior restoration. The previous campaigns of restoration undertaken on the painting did not use techniques that were conservation-friendly and so were very visually apparent. The canvas was very brittle and weakened and had contributed to causing unstable paint, flaking and losses of the paint layer. As this painting is very special to Ms Wrightson’s family, they had an unusual request for their artwork and asked if they may be able to assist in any part of the restoration. It would be a unique moment for their family and we were happy to oblige.
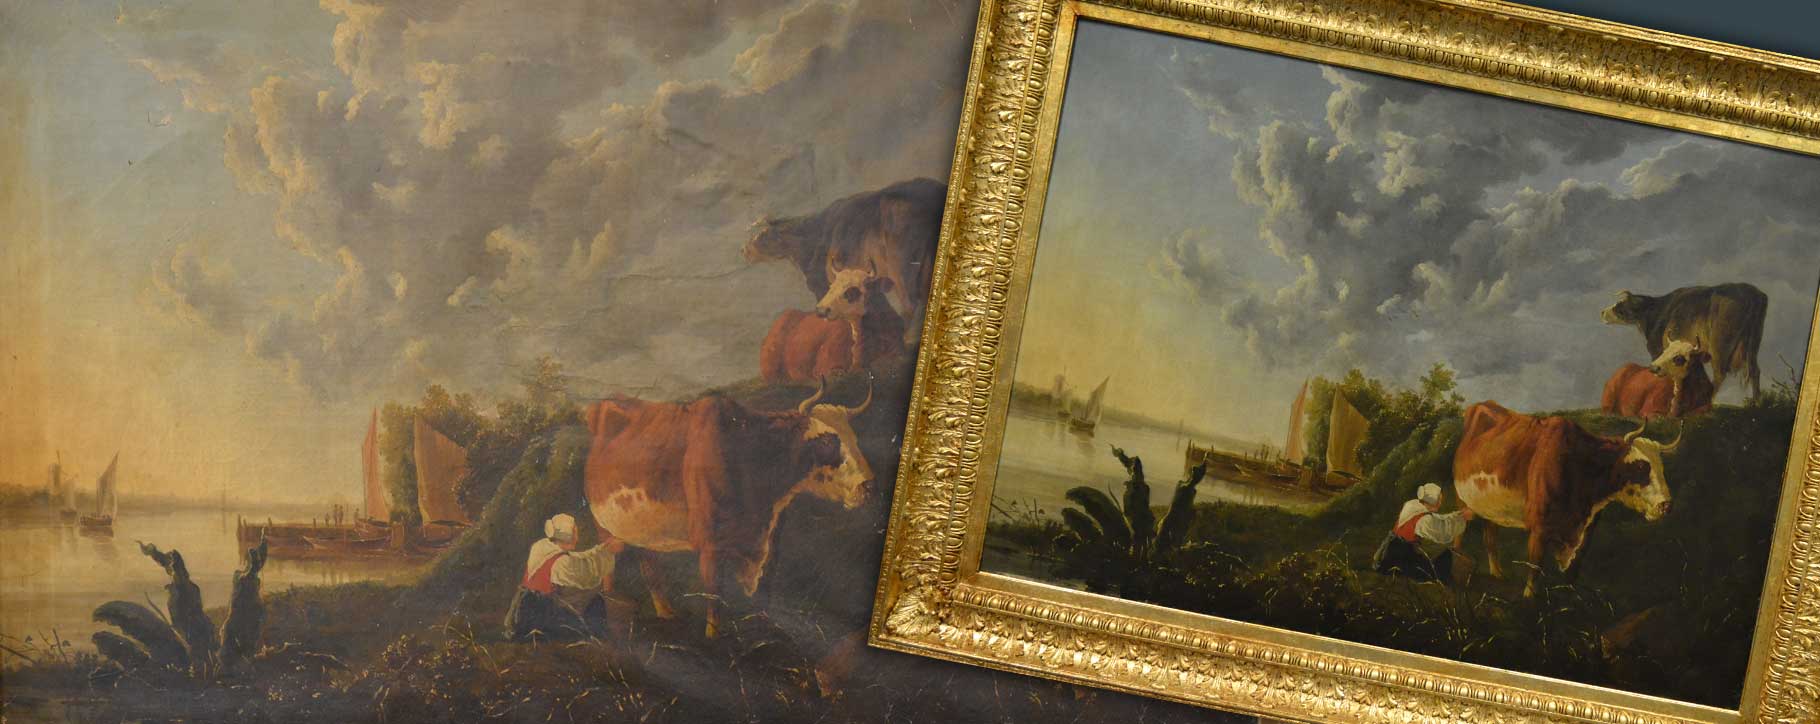
The painting was first removed from its frame, and an initial dry clean removed the cobwebs, insects, dust and dirt for the frame and back of the painting. Once we could guarantee the paint layer was intact, we could then remove the varnish from the painting. Our talented team made a water-based gel to remove the varnish that was safe to use for our clients and required no safety equipment.
After varnish removal and cleaning, we turned our attention to the structural side of the restoration; removing the large patches on the back of the painting holding the tears in place – and actually repairing these tears. The tear covered a large proportion of the painting so the best solution was to complete a full line of the canvas. To complete the tear repair, we applied filler to the areas of exposed canvas where the paint had been lost and carefully retouched the area to sympathetically match the existing pigments. The final step of the restoration of the painting was to re-varnish to provide a protective and lasting finish for the painting.
It was a very enjoyable experience for our team having Ms Wrightson and her partner join us in the studio for a special couple of days. The painting was returned after completion and our clients were delighted to receive it back home and celebrate its return with their family.
For more details, read our full Case Study for this painting. IMG
Landscape scene of Rame Head in Cornwall
The landscape painting had been so significantly torn that full lining was required. Before we approached lining, the first treatment we carried out was to repair the tear using out a thread-by-thread method with bonding. In a couple of places, there were holes in the canvas where the impact had been at its greatest. We secured canvas inserts to the back of these areas to make up for the missing canvas.

After the tear repair was completed, we removed the old varnish and surface cleaned the painting. We could then begin the lining process to fully restore the strength and stability back to the painting. Following this, we retouched the painting for the substantial losses that occurred when the painting was damaged and revarnished the painting for future protection.
It was a pleasure to be able to deliver the painting back to our client, who was delighted with the results and to finally have such precious artwork home.
For more details, read our full Case Study for this painting.
The painting on the pillowcase
Mr Stoddart’s special family painting is a restoration we often look back on. It was quite clear that this oil painting had a colourful history. Our first clue was that the painting had been amateurishly ‘lined’ with glue onto a pillowcase. As well as this highly unusual support, there were holes around all of the edges due to old pins or tacks, a puncture on the lower left of the painting and a tear. The top left corner of the painting was also missing. One of the most striking aspects of the painting when we first looked at it in person was how discoloured and dirty it had become after hanging above an open fire.
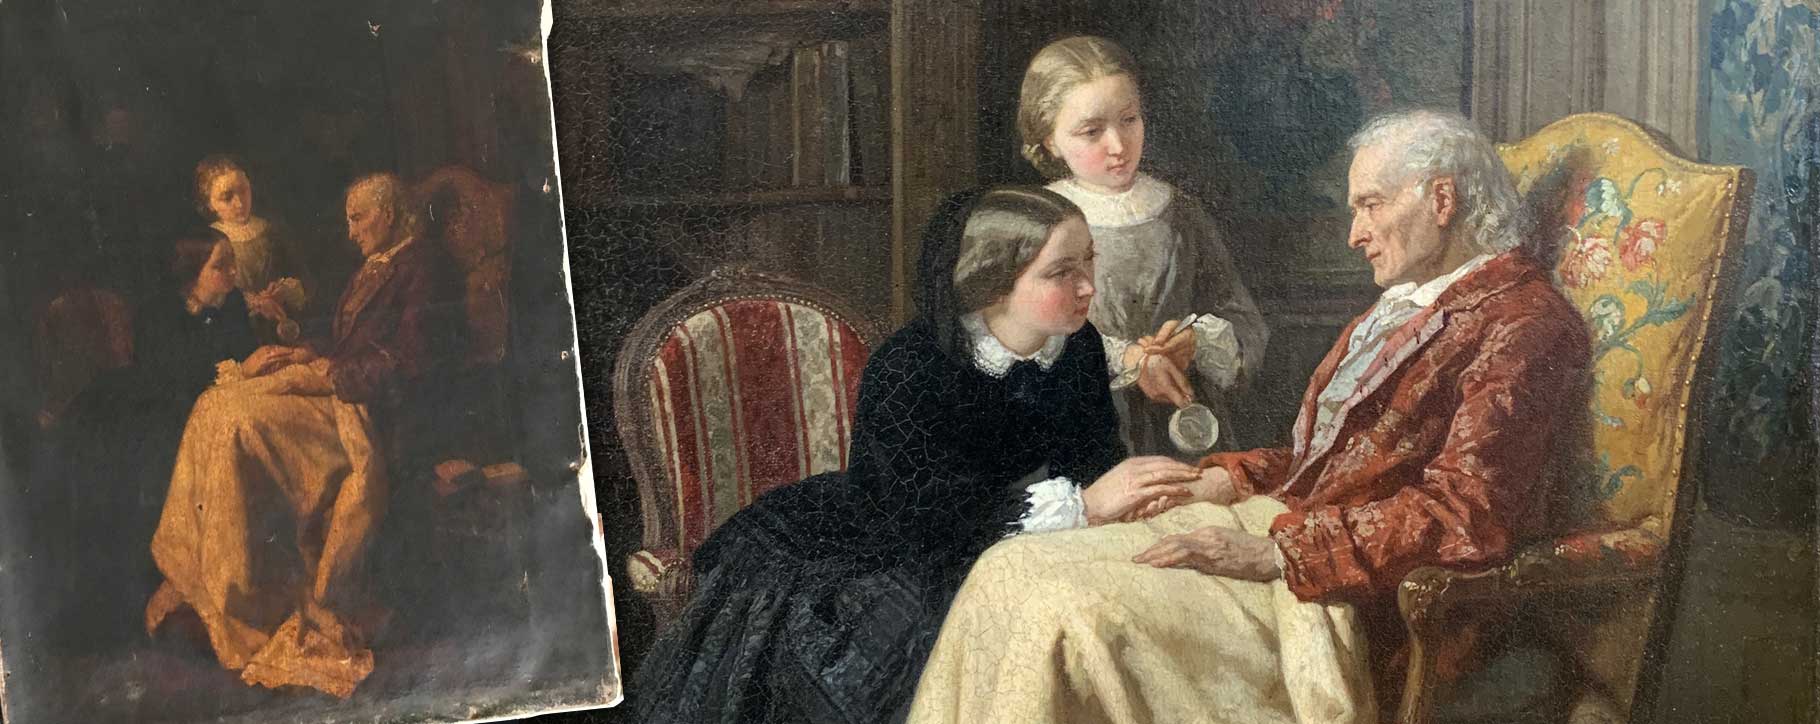
After completing the necessary structural repairs to the tear, we could turn our attention to cleaning and varnish removal. This had astonishing results and the new details that were revealed were quite remarkable. Lining the painting followed and the new canvas added to the missing top left area could then be filled and retouched. The artwork has become a very special painting to Mr Stoddart and his family, and we were delighted to hear they were thrilled with the results of the restoration.
For more details, read our full Case Study for this painting.
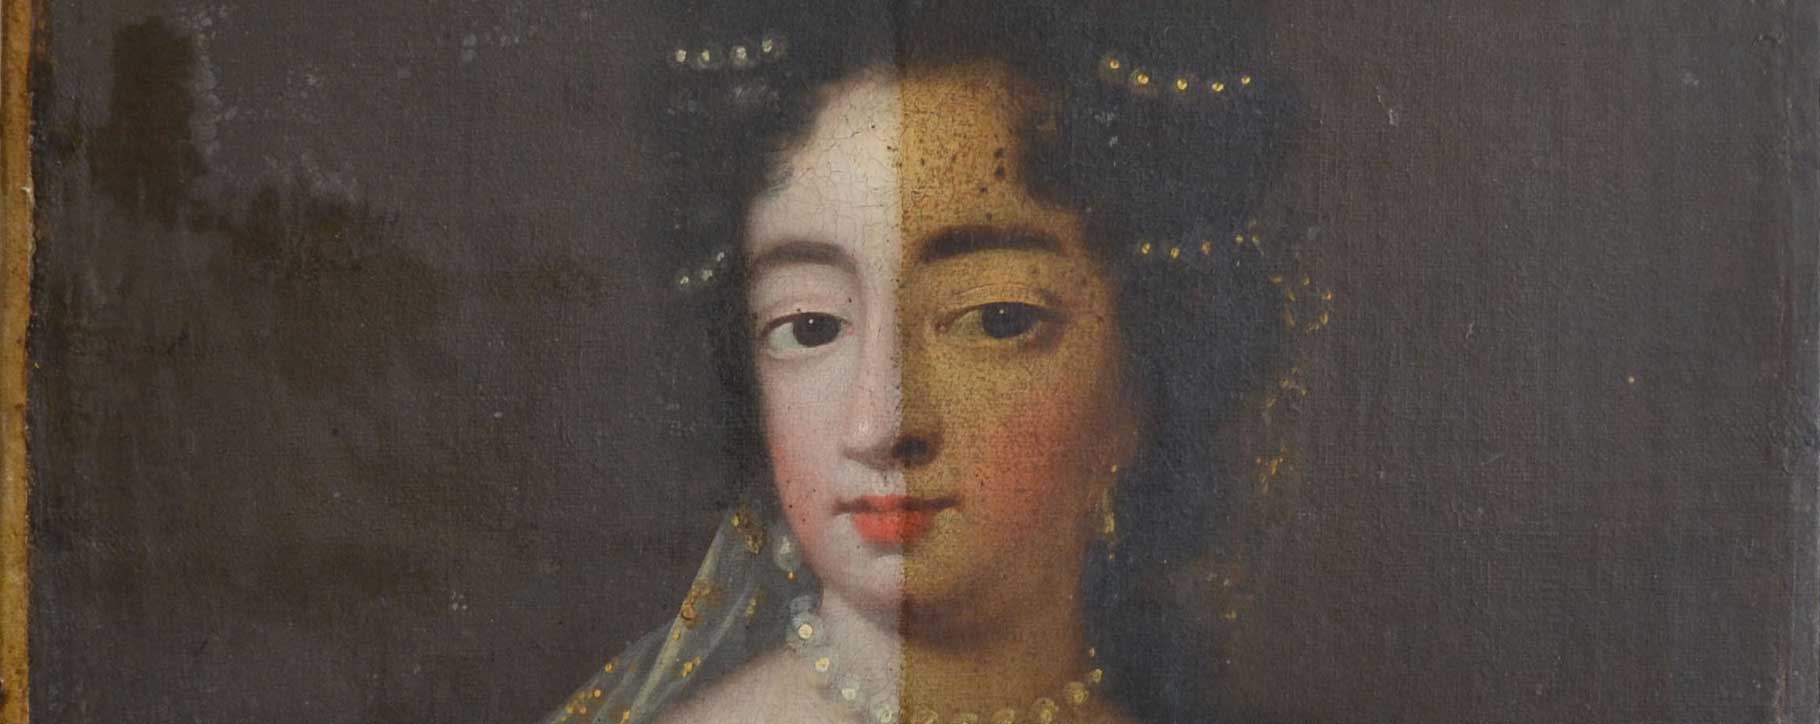
Water damaged oil portrait
When an oil painting becomes water damaged, its appearance can change dramatically. This was especially true for Mrs Pownall’s family painting after it was damaged by a flood through a ceiling while being stored under a bed.
The significant damage caused by the water covered the perished varnish and caused the painting to be marked all over by mottled cloudy patches, recognisable as ‘blooming’. The water had spread across the whole of the painting, and the damage was particularly concentrated on the sitter’s face and upper half. When it arrived in the studio it had dried out naturally.
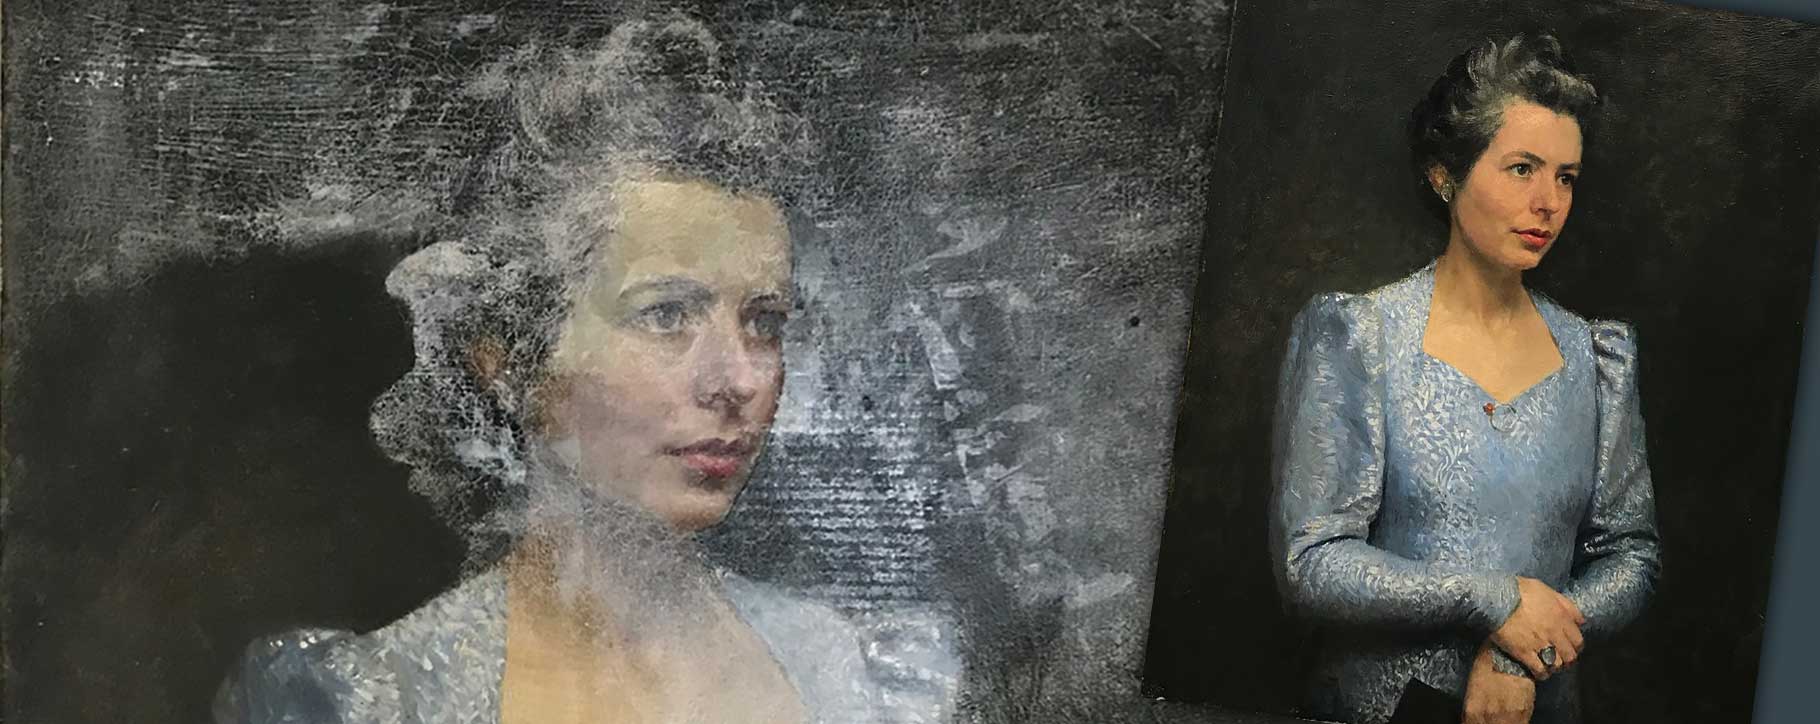
Thankfully, the painting was structurally sound, with no tears or holes. While studying the painting under UV light, our conservators uncovered overpaint that had been added at some point historically to alter where the shoulder was originally placed. As part of the treatment to the painting, we could remove the overpaint, examine the condition of the paint layer underneath and fill and retouch any areas where necessary. Where the paint layer had become unstable due to the absorption of water, these areas were consolidated and fully stabilised. This measure was taken to prevent any lifting and subsequent flaking of the paint layer.
After completing the solvent test windows on the painting, it was clear that there was going to be a fantastic result from removing the surface dirt and contaminants present in the water.
As a result of uncovering the original position of the shoulder after removing the varnish, some retouching was required. In the same way, we also retouched areas of the sitter’s face that had previously been overpainted and were subsequently removed when the varnish was taken off.
Once the restoration was completed, the contrast before and after the restoration was striking. The damage has been comprehensively treated and the lost colours have been fully revived.
For more details, read our full Case Study.
Mr Peers’ ancestral painting
When Mr Peers’ painting arrived in the studio, our conservators immediately realised the potential restoration had to return the artwork to its original stately manner. The artwork is a strong portrait of one of Mr Peers’ ancestors, a merchant from London. The artwork required multiple treatments; the most evident damage was a tear, along with two white water trails running down the painting, and it was also flecked with a white substance, possibly paint.
The painting was not comfortably attached to the stretcher bars, which caused buckling and it was not positioned correctly within the frame, as highlighted by the obvious gapping. The canvas on the margins of the painting had worn away and did not properly reach around the stretcher bars. It was therefore not possible to properly re-tension in order to decrease the buckling. If the margins of the canvas continued to be abraded, so too could the main surface of the painting.
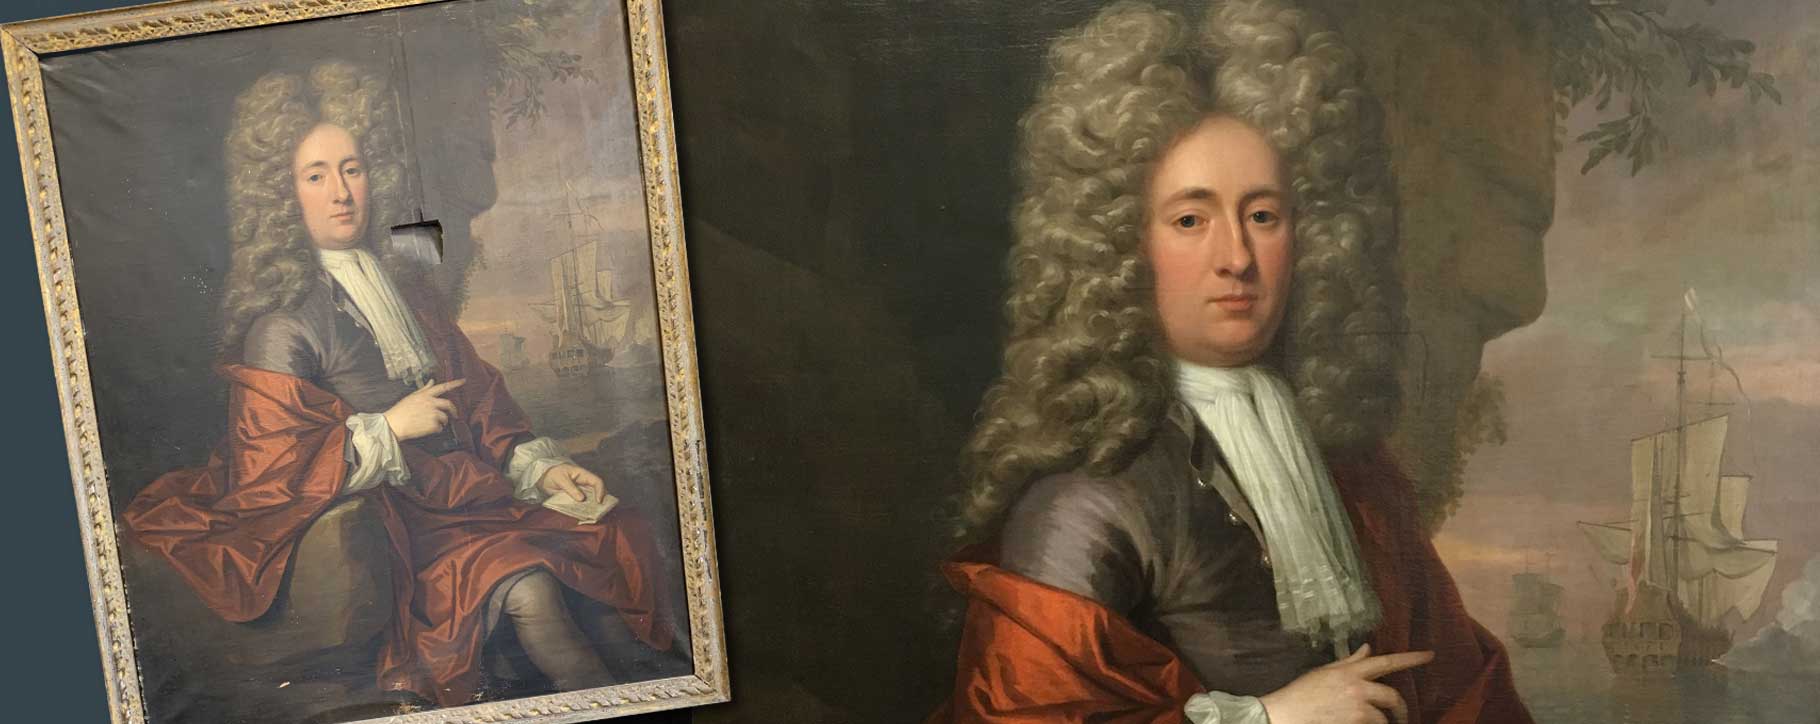
Treatment started with repairing the tear using a thread by thread method. With the tear now mended, we focused on the remaining structural work and strip-lined the painting to provide much-needed support where the canvas was deteriorating. With the structural work complete, we began the varnish removal and cleaning stage of the restoration. The cleaning also removed the two (likely water) marks running down the painting and the white flecked substance. After applying a filler to the tear repair on the area of exposed canvas, we could carefully pigment match against the original paint layer for retouching.
We were delighted to restore this impressive painting and preserve an important piece of Mr Peers’ ancestral history.
For more details read our full Case Study.
Courtier of French Court, 1588
This fascinating 16th Century oil painting arrived in a very dark and dirty condition, with tears that had been unsympathetically previously repaired. The old tears have been glued together and were rather evident – particularly on the top right of the painting where the writing no longer aligned as it should due to the tear through it.
The painting had been inherited from family and so was a special piece to our client. The multiple treatments undertaken included reversing these previous tear repairs and carrying out a more seamless restoration. There was also a puncture hole in the canvas, which was likewise repaired using a thread-by-thread method. Due to the condition and age of the canvas, it also became important to complete a full reline to restore the painting’s structure and tension.
Because the painting dates back to the 16th Century, there was treatment need to carefully address the stretcher bar marks and the brittleness apparent on the edges of the canvas that had been affected from previous inappropriate framing.
We completed consolidation and stabilisation treatment to address certain areas of cracking paint and to help preserve the paintwork for the future. Once the structural treatments were completed, we completed surface cleaning and varnish removal, and it was fantastic to be able to see the key details of the painting again.
While removing the varnish, we also addressed prior in-painting/overpainting completed from the previous restoration that has not been carried out sympathetically. Lost paint was carefully restored after sympathetic matching of pigments.
Finally, we re-varnished using conservation-grade, non-yellowing varnish for even finish and for protection going forward.
Smooth sailing ahead
Over the years, we have received many wonderful seascape paintings in the studio. For one painting we most recently restored, varnish removal and cleaning has made a remarkable difference to the painting – and created one of the most striking halfway progress photographs that we have taken. The painting was structurally sound, with no tears or holes. It was suffering from flaking paint and in some areas, paint loss, which would need to be most urgently addressed.
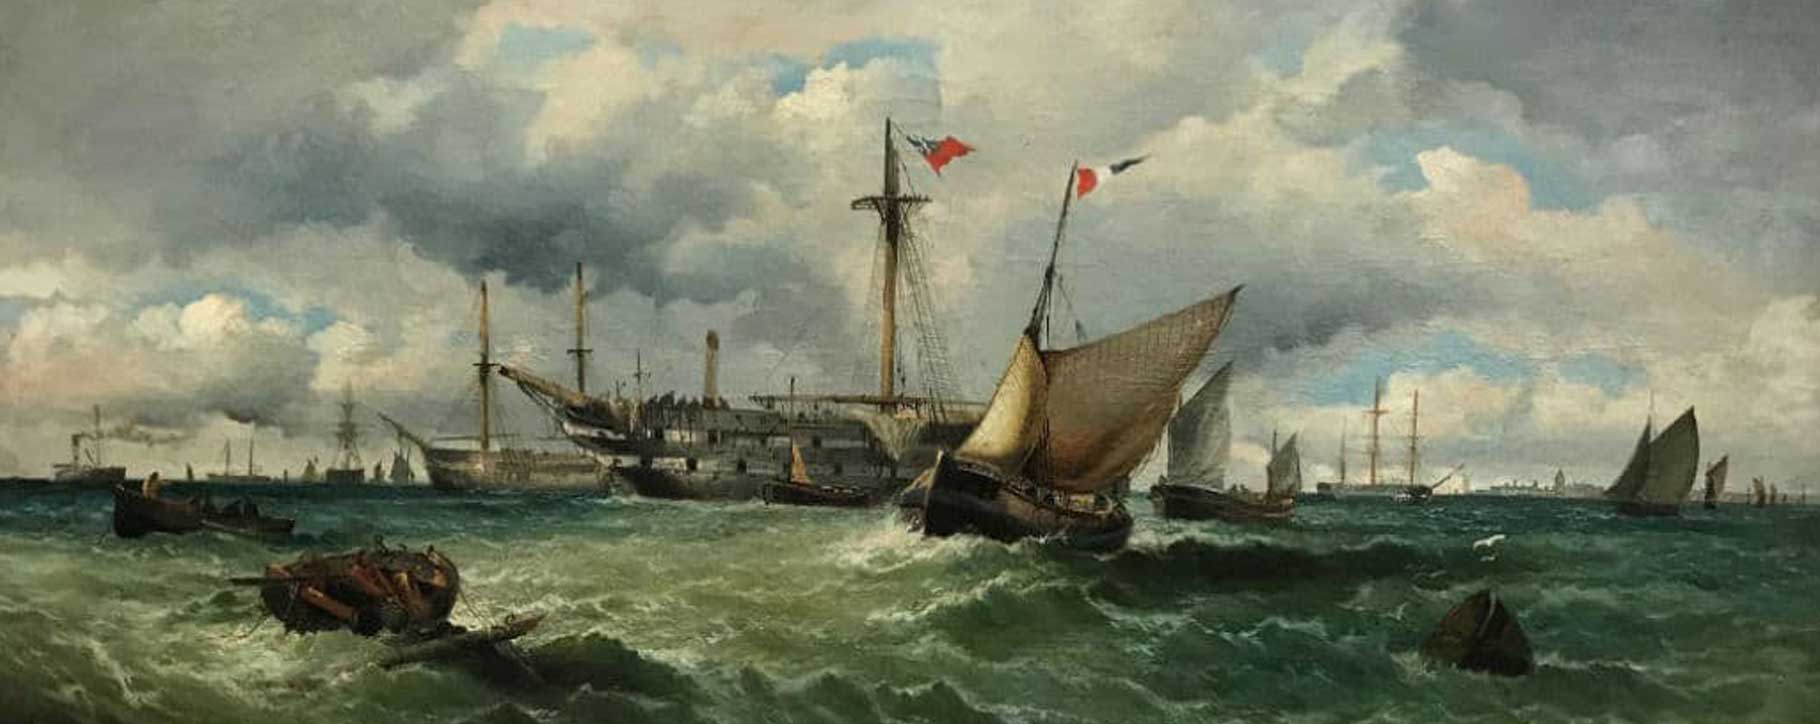
It was also apparent that the varnish layer had perished and had tinged the paint a yellowish hue, which was unsightly and obscuring key details of the painting. Our first priority was to stabilise the paint layer and stop any more flaking paint from becoming loose. Due to the paint layer’s widespread fragility, this would need to be addressed across the whole of the painting using Japanese tissue, which fully consolidated the paint layer.
The restoration then continued with surface cleaning and varnish removal to remove dirt, contaminants and the perished yellowed varnish with astonishing results. After the cleaning was complete, we could turn our attention to retouching the painting where there had been numerous losses. Despite the turbulent sea and cloudy sky of the painting, it’s smooth sailing ahead for the painting now it has been returned home.
For more details, read our Case Study.
Torn lithograph
Repairing works on paper that have been torn can seem like a daunting task – especially because they are such delicate items. But when we assessed this torn watercolour with our paper conservator, we knew we would be able to achieve an excellent result. We first cleaned the lithograph in our solution and addressed the foxing that was evident on the painting, as well as associated staining this has caused.
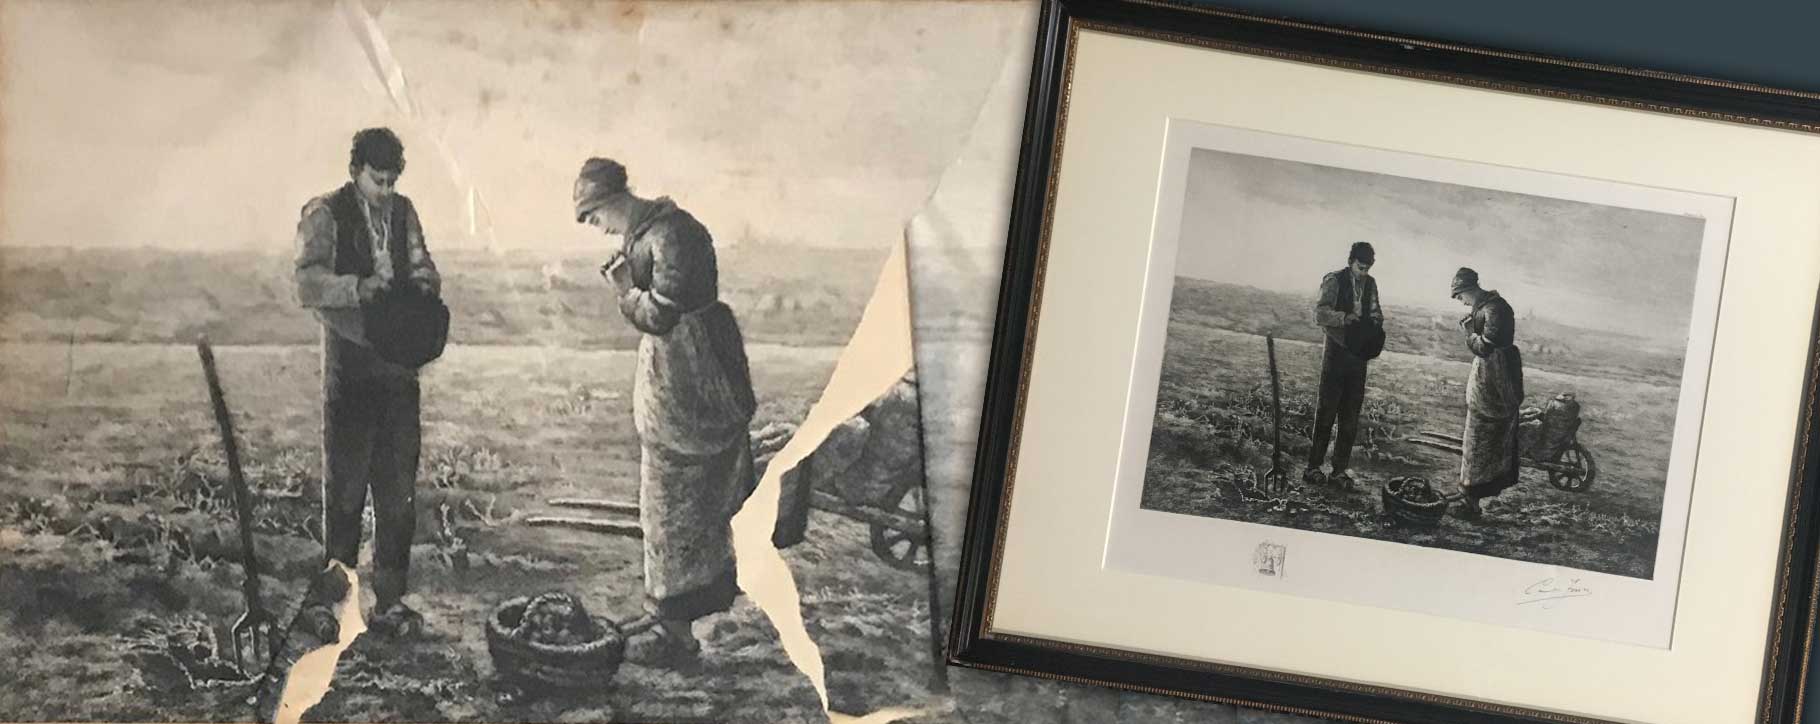
For works on paper with tears, missing areas, punctures or holes, the most common method for repairing is to fill the damaged areas with liquid paper pulp, and subsequently line with Japanese tissue for the most comprehensive structural stability. This treatment worked wonderfully for the lithograph. The liquid paper pulp is always carefully sized and with the correct weight to fit the exact loss after careful examination. The aim is to integrate this new material carefully with the original fibres to ensure the repair is completely seamless.
Because the mount was so badly stained and contaminated this was also replaced, and then the artwork was reframed. It’s a fantastic result, and our client was delighted to receive it back.
A collection of 39 etchings
Recently a client approached us with a collection of 39 etchings that he had great concern over. The individual etchings suffer from foxing and acidic contamination and they were being contained within two very old and frail portfolios that were barely intact. We were able to remove the etching from their inappropriate backing (which had also further discoloured), clean the collection and treat the foxing.
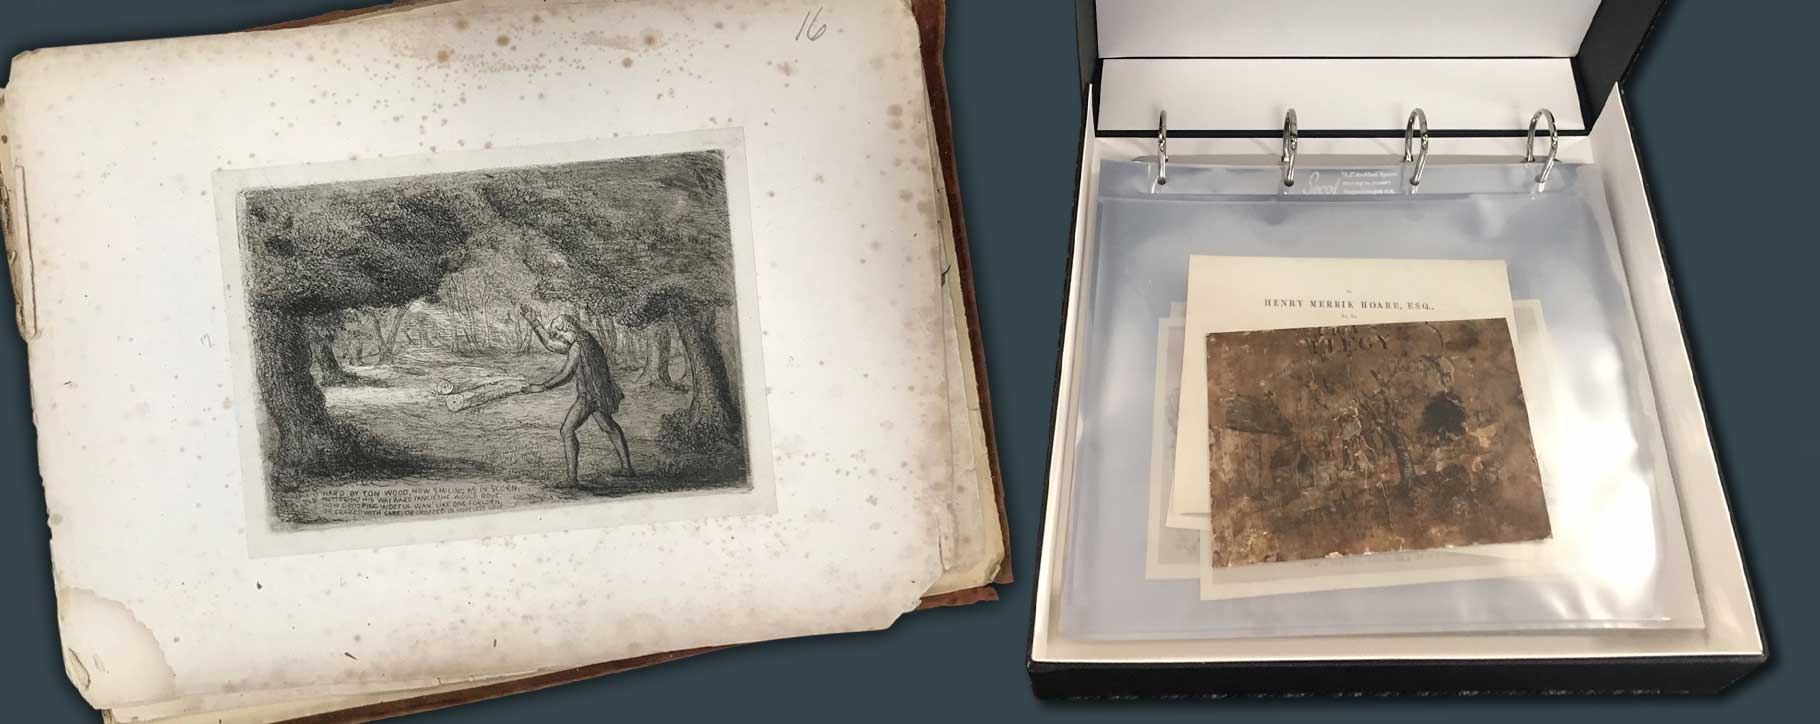
The contaminants were lifted, inappropriate acidic backings were removed, and the whole look of the artworks became much fresher and healthier. We showed our client the results after initially proceeding with two etchings, and on seeing the fantastic difference achieved, they decided to proceed with the remaining 37. We advised that appropriate display and storage for such a collection was vital to ensure they were protected going forward.
The best solution was to have the etchings carefully displayed in a museum-standard archival ring binder box. This type of storage and display solution is suitable for protecting works on paper to conservation standards and is moisture and vermin resistant. Our client was very pleased with the results of the restoration, and also the smart and safe display solution so these artworks can be enjoyed for the years ahead.
For more details, read our Case Study.
One vintage ashtray in ten pieces
Our ceramic team can work wonders with delicate pieces, and even the most complex repairs bring excellent results. A brilliant example is this vintage ashtray that had been accidentally broken into 10 pieces. Quite understandably our client wanted to try and repair the ashtray as quickly as possible at home. Although this idea, unfortunately, didn’t go quite according to plan…
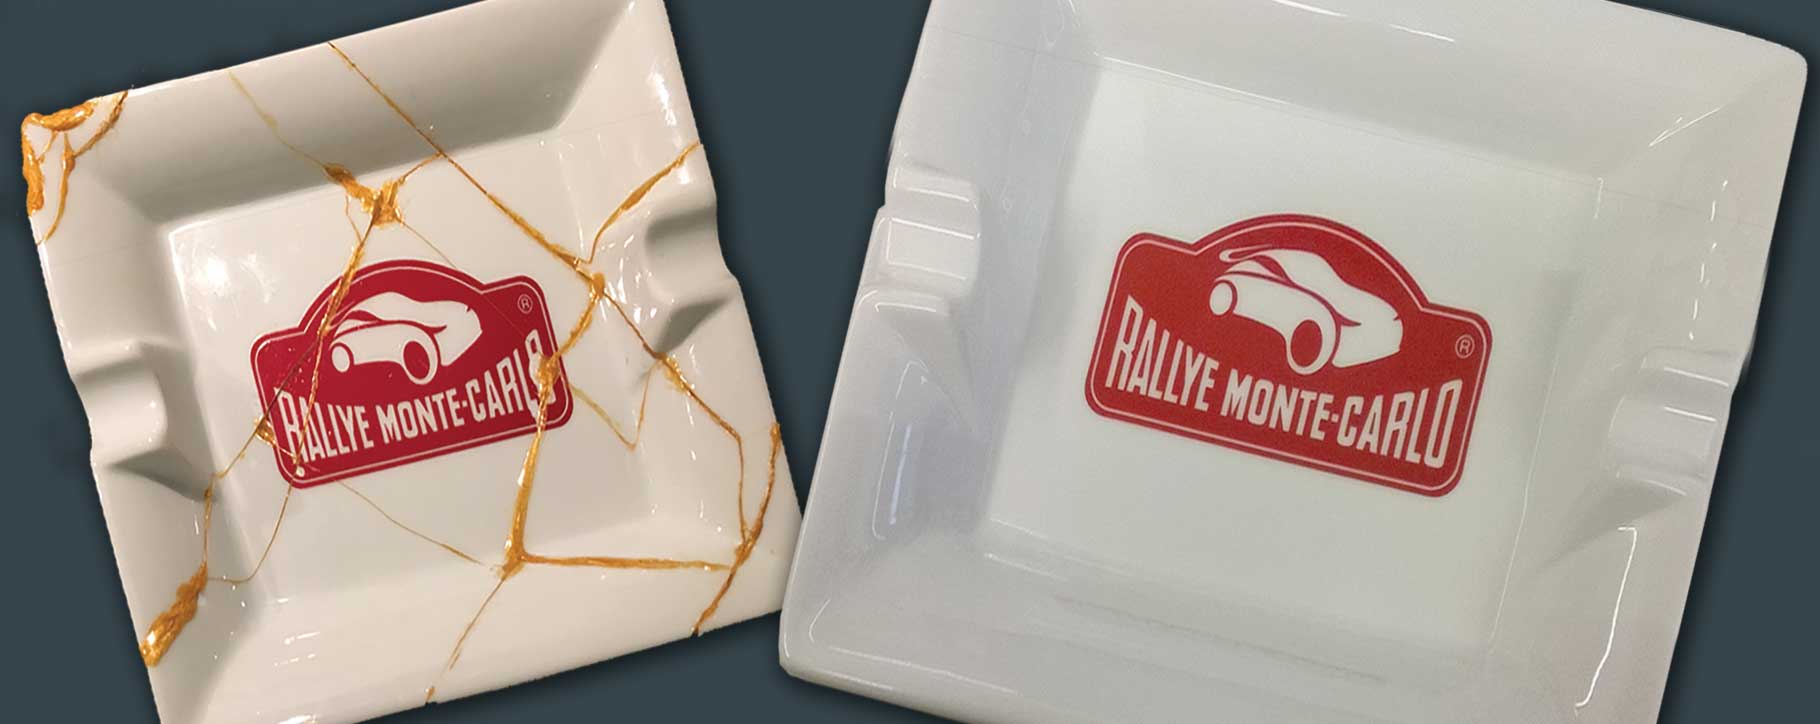
Our client had attempted to repair the ashtray with epoxy to glue the pieces back together, leading to it seeping out of the sides where the pieces should re-join. Luckily, all of the broken pieces were still to hand so no new substantial pieces would need to be created. Once the ashtray arrived in the studio, our ceramic conservator first removed the epoxy and disassembled the ashtray. Once we had carefully reversed the glued sections, we cleaned each of the ten parts to remove all residual traces of the epoxy and then to remove any contaminants and ensure no dirt was trapped in the joins. The broken pieces were then re-adhered securely back together, with only minor missing fragments needing to be re-created.
Minor retouching was also required on the logo of the ashtray, where the broken pieces split through. With the ashtray being mostly pure white, the results of this seamless restoration speaks for itself. There are no marks or crack left on the ashtray – achieving a result where it looks as if no damage ever occurred is always our objective.
For more details, read our Case Study.